Monday, April 21, 2014

Portobello Mushroom Burgers


I know I've mentioned in a previous post that I've been trying to partake in "clean eating." What this means is basically omitting any foods with chemicals or preservatives, and focusing on cooking with nutrient-packed ingredients. Clean Eating also means making an effort to eat produce that's in-season. The reason for this is most likely that vegetable or fruit will be grown in the US and will taste way more delicious.


My new plan this spring/summer is to go the grocery store and buy whatever produce looks good and create a meal out of it. So, instead of writing "cauliflower" or "brussel sprouts" on my grocery list, I simply write "vegetable one" and "vegetable two."


This weekend I ventured to an amazing farmer's market near me and they had the most beautiful portobello mushroom caps. Along side these were the biggest heirloom tomatoes that I've ever seen! As soon as I saw both of these ingredients, I instantly knew I had to make portobello mushroom burgers.


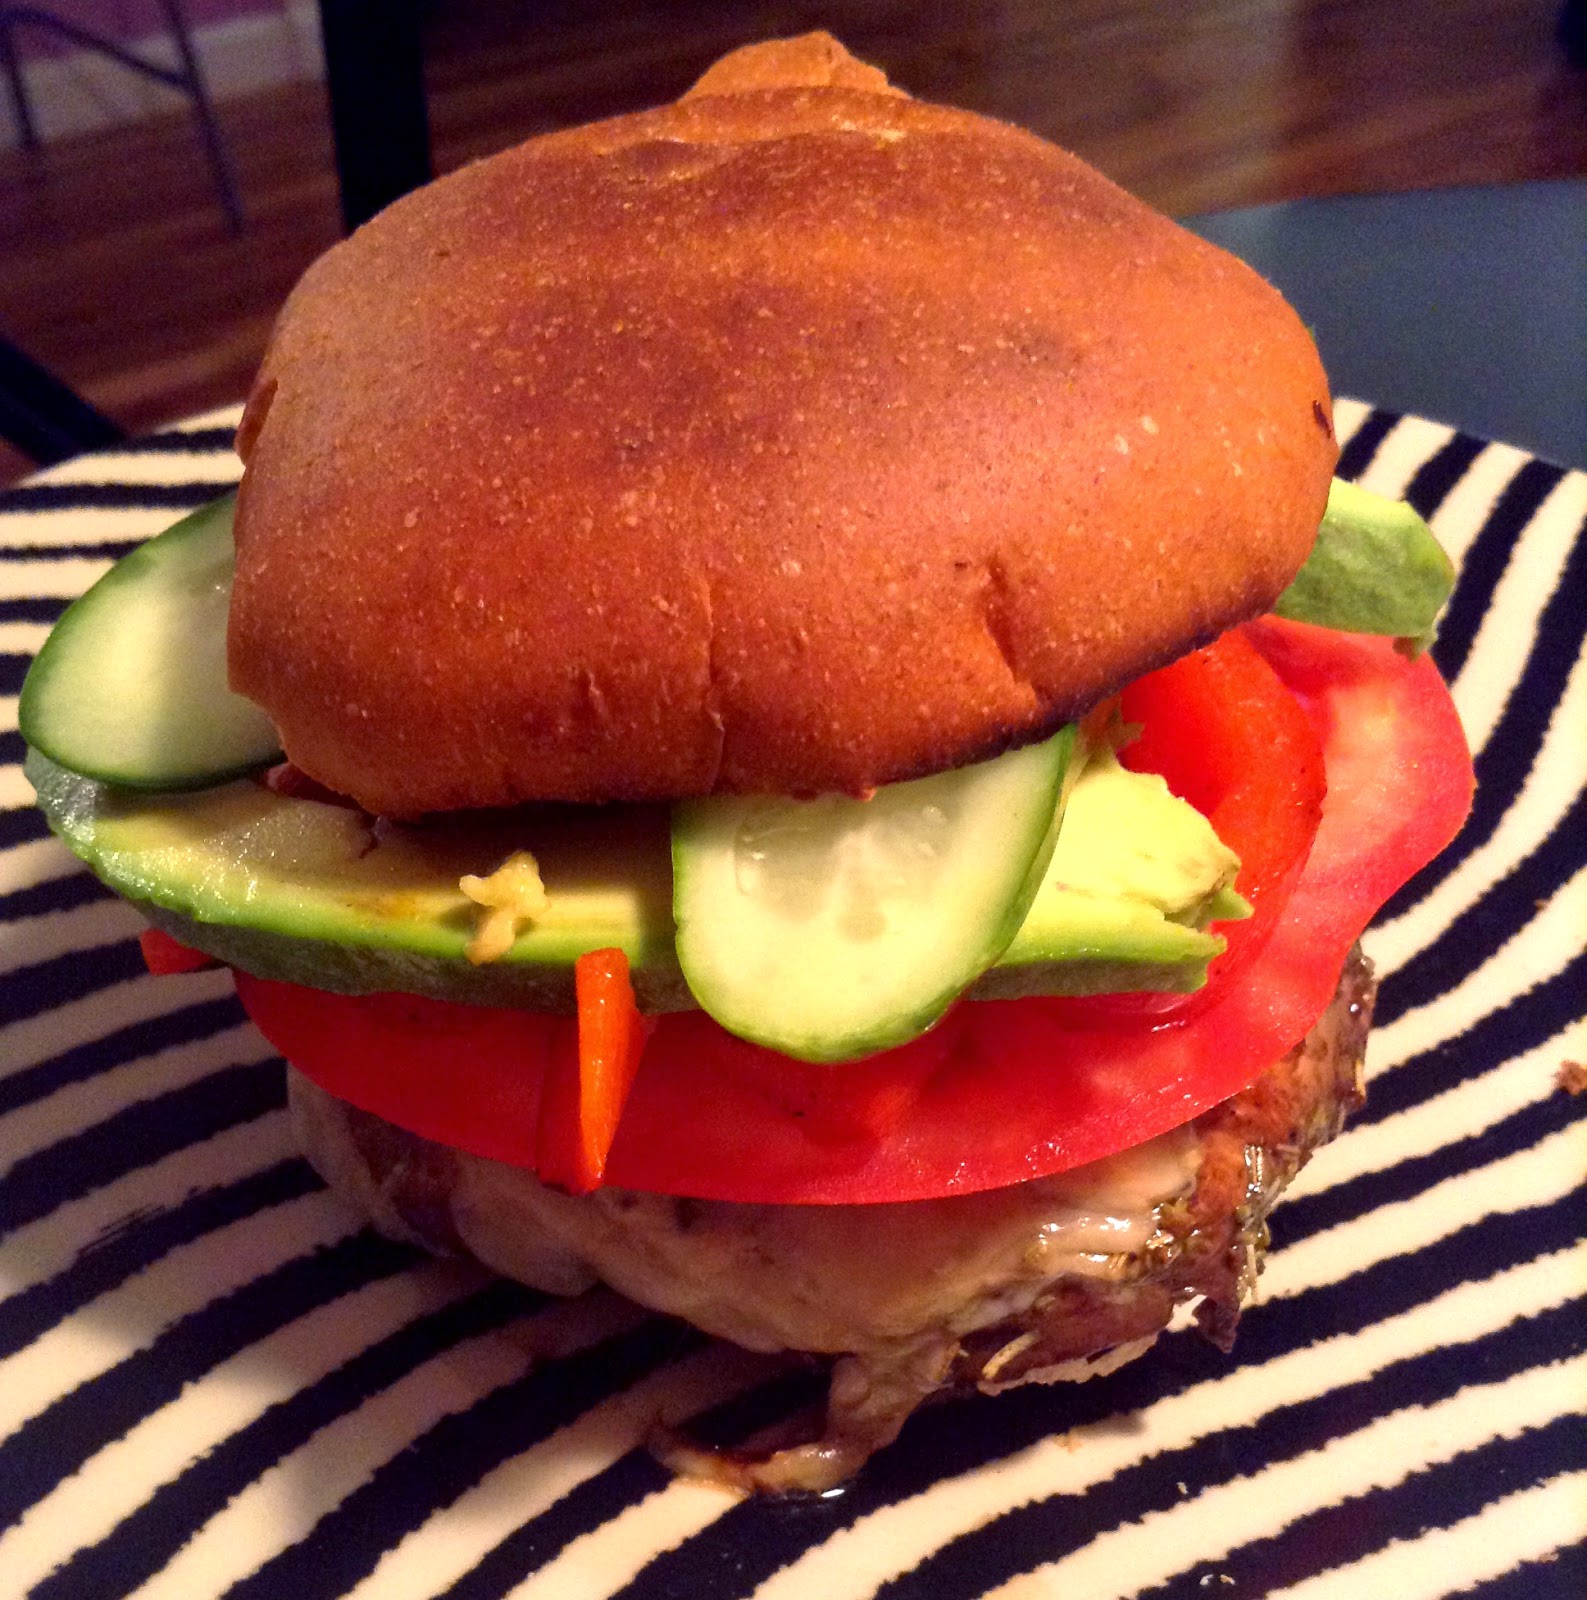
I loaded these "burgers" with fresh avocado, salty pickles, sauteed red peppers, the gorgeous heirloom tomato, and spicy mayo. My, oh my, these were ridiculously good!


Mushrooms are superfoods because they contain compounds such as lectins and glucans which are said to lower the risk of getting certain cancers. Mushrooms are a also a great source of potassium which helps keep blood pressure low. Additionally mushrooms contain many nutrients including selenium, biotin, and riboflavin which are essential to maintaining good skin and hair health.

You need to do a little bit of prep work with these mushrooms. First things first- don't ever rinse mushrooms under water. They are super porous so if you drench them in water they will never brown up in a pan. Start by getting a damp paper towel or cloth and cleaning the grit and dirt of the mushrooms. Then remove the stem and either discard or chop up to saute on the side of your "burgers."


Ingredients:
2 portobello mushroom caps
2 tbsp. olive oil
1/4 cup balsamic vinegar
1 tsp. Italian seasoning
1/2 tsp. salt
1/4 tsp. pepper
1 lime- juiced
1 avocado- sliced
1 red bell pepper- sliced
1 pickle- quartered
2 slices of ripe tomato
2 whole wheat hamburger buns
2 slices low-fat cheese (I used Provolone)
3 tbsp. light mayo
1 tbsp. sriracha 

Directions:
1) Marinate mushrooms in a zip-loc back olive oil, vinegar, Italian seasoning, and lime for 20 minutes in the refrigerator 
2) Make spicy mayo by mixing sriracha and mayonnaise 
3) Heat pan over medium-high heat and add a little bit of olive oil
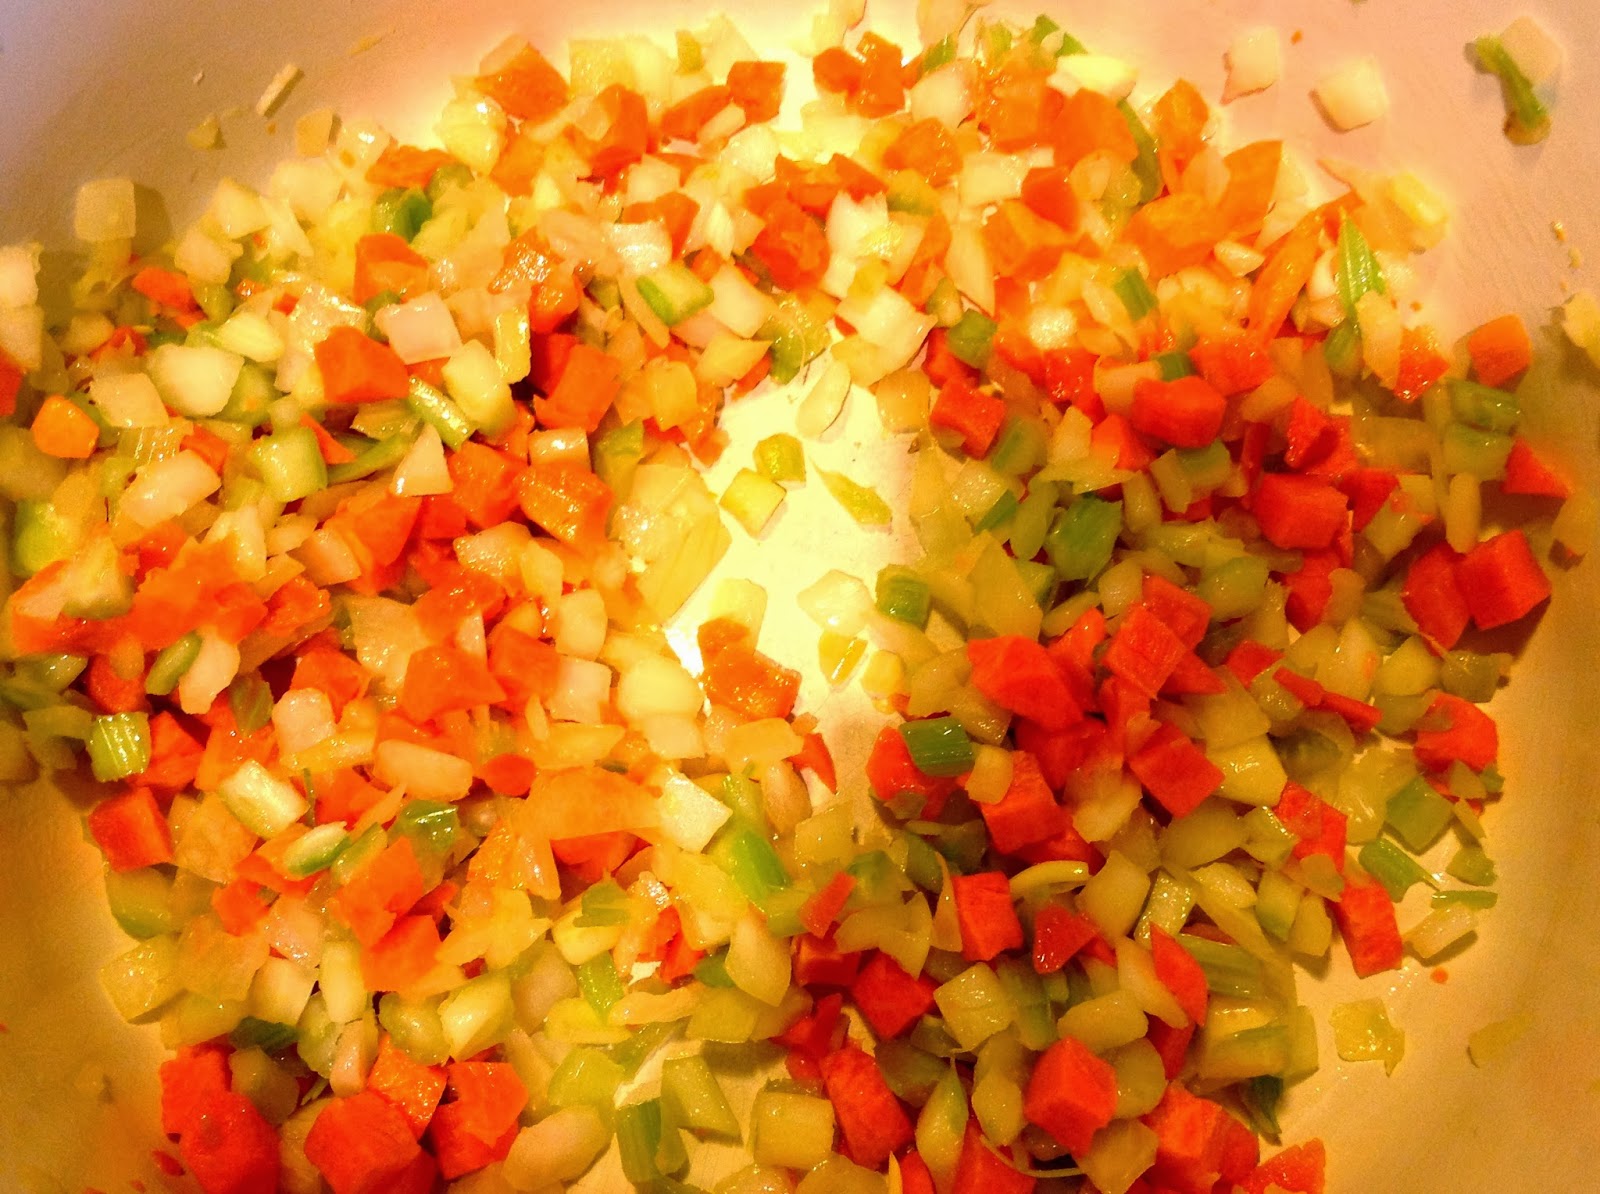
4) Saute bell pepper for 5-7 minutes or until tender
5) Heat grill pan over medium-high heat and spray with non-stick cooking spray
6) Add mushrooms to the pan (just the mushrooms not the marinade) and sprinkle with salt/pepper. Cook for 6-7 minutes before flipping
7) Sprinkle salt/pepper on other side of mushroom and continue to cook for another 6-7 minutes or until mushroom is tender
9) When the caps are just about done, top with cheese and cook until melted
8) Toast buns and spread with spicy mayo. Add mushrooms, bell pepper, tomato, pickles, and avocado.
9) Eat up and enjoy!!

Sunday, April 6, 2014

Superfood Breakfast Cookies


I know what you must be thinking... cookies for breakfast?! Yes, my friend, these cookies are so hearty and healthy that you can have them for breakfast and feel absolutely great about it. These breakfast cookies are packed with superfoods: oats, bananas, cashews, chocolate, chia seeds, flax seeds, and my superfood of the week- hemp seeds. You can find hemp seeds in the organic section in your grocery store, at Whole Foods, or on Amazon.


Personally, I think the best way to eat these cookies is right out of the oven when they're hot and chewy and the chocolate chips are melted and gooey. Another great option is to re-heat them in the oven for a few minutes or microwave them until the chocolate melts. If you are not going to finish the cookies in one day, I would recommend storing the rest in an air-tight container in the refrigerator.


I don't know about you, but any breakfast that contains chocolate is sure to make me smile. These cookies are so decadent and delicious that you'll find it hard to believe how incredibly nutritious they are. Similar to many of my other recipes, these cookies are super versatile. Feel free to play around and make them your own by switching up the dried fruit, nuts and seeds. I hope you enjoy this recipe!


Hemp seeds contain omega-3 fatty acids which can help prevent against coronary heart disease. Additionally, hemp seeds contain the antioxidant Tocopherol which is known to help lessen a person's chances of developing Alzheimer's Disease. Lastly, hemp seeds contain all of the essential amino acids, as well as a good amount of fiber, protein, and fat, making them a fantastic addition to one's diet. 
*Try these magical seeds in oatmeal, smoothies, cold cereal, and baked goods.


Ingredients:
1 cup rolled oats
2 bananas
1/2 cup chopped nuts (I used walnuts and cashews)
1/4 cup semi-sweet chocolate chips
1/8 cup dried fruit (I used cranberries)
1 tbsp. hemp seeds
1 tbsp. chia seeds
1. tbsp flax seeds
1 tsp. cinnamon
1/2 tsp. vanilla
1/2 tsp. sea salt

Directions:
1) Preheat oven to 350 degrees and spray baking sheet with nonstick cooking spray
2) Mash bananas with a fork and combine with oats
3) Add remainder of ingredients and stir with a spoon until well combined
4) Spoon batter onto cookie sheet and press down to flatten slightly
5) Bake for 12-14 minutes
*Recipe yields a dozen cookies

Sunday, March 30, 2014

Homemade Roasted Cashew Butter


If you follow my blog, you know about my deep love for peanut butter. You probably also know about my recent experiment with sunbutter (sunflower seed butter) which turned out amazing. Today, I decided to play around with a new butter- cashew butter.  I've seen cashew butter in the grocery store before but it's always so expensive and contains more ingredients than I deem to be acceptable in a "natural" nut butter. 


I chose to experiment with cashew butter because I absolutely love the taste of cashews. I am really excited to say that the recipe was a huge success and turned out perfectly creamy and flavorful. The key to its "deliciousness" is the flavor you get from roasting the nuts. I bought raw unsalted whole cashews at Whole Foods and roasted them myself. The grocery store will probably carry roasted and salted cashews, but I strongly recommend roasting the raw nuts yourself to get the most flavor into your cashew butter.


This recipe makes a ton of cashew butter- probably about 20 servings worth. I'd suggest putting it in a tupperware and storing it at room temperature until it's gone (which may not be very long since it's so yummy!)


You can use the cashew butter just like you'd use peanut butter or almond butter. It's delicious when spread on toast or crackers, you can put it on an apple or banana, or even try it swirled around in plain Greek yogurt for a protein-packed breakfast. Whatever you do with it, I know you are going to love it. :)


Cashews are a superfood because they provide heart-healthy monosaturated and polysaturated fat which are known to help lower bad cholesterol and reduce the risk of heart disease. Cashews also contains flavanoids which are said to lower the risk of many cancers. Additionally, cashews contain high amounts of copper which help provide the body with energy and help aid in flexibility in joints and muscles. 


Ingredients:
3 cups raw unsalted cashews
1/2 tsp. sea salt

Directions:
1) Preheat oven to 350 degrees
2) Place cashews on foil-lined baking sheet
3) Roast nuts in oven for 12 minutes (stirring around halfway)
4) Place roasted cashews in food processor and add sea salt
5) Pulse a couple of times until cashews are crumbly
6) Process cashews for 10 minutes stopping after every couple  of minutes to scrape the sides of the bowl
**You may be tempted to add oil or water to the mixture because it looks very dry initially. DON'T DO IT! The mixture will get thick and creamy and will eventually turn into cashew butter, I promise! Just be patient and you'll see. **

Wednesday, March 19, 2014

Penne with Sautéed Shrimp and Avocado Pesto


I cannot tell you how excited I am about this blog post. The idea for avocado pesto actually came from my husband! I'm not sure if he saw a recipe somewhere or just thought of it himself but one day he told me I should make it for my blog. I thought this was a perfect idea because I've been wanting to use avocados as my superfood and I happen to be obsessed with pesto.

Typically in pesto, you mix some sort of green- like spinach, arugula, basil, or cilantro with a nut, citrus, cheese and some oil. Because avocados are full of heart-healthy fats, I figured I could probably omit the oil all together and make the dish incredibly healthy. Well...I was right! The pesto was creamy and flavorful and makes me not want to make an avocado-less pesto ever again!


I wanted to make this recipe into a full meal which is where the penne and shrimp come in, but you could really use the pesto on anything! To give you some ideas- you could use it on grilled chicken, any kind of fish, over grilled or roasted veggies, on potatoes or rice, or even on a sandwich! This recipe made A LOT so we wound up freezing 2/3 of it for another time. 


There are more health benefits of avocados than I could possibly mention. Here are just a few of this superfood's amazing qualities: avocados are packed with Vitamin B6 and Folic Acid which can help lower the risk of heart disease. Avocados are also full of flavanoids which help reduce the body of inflammation and certain diseases. This superfood is exceptionally good for your skin, as it can help reduce redness and irritation and also prevent wrinkles and other signs of aging.  Additionally, avocados contain certain acids which are said to reduce the risk of a few kinds of cancers. 

Ingredients:
2 avocados
2 limes- juiced and zested
1- lemon juiced
2 cloves garlic- grated or minced
1/2 cup slivered almonds
2 cups arugula
2 cups basil
1/2 cup grated parmesan or pecorino romano
1/2 lb. whole grain penne
10 shrimp peeled and deveined 

Directions:
1) Cut avocado and scoop flesh into a food processor
2)Add lime juice, lime zest, lemon juice, garlic, almonds, arugula, and basil to the food processor
3) Pulse food processor a few times and then blend for a minute or until pesto is thick and creamy
4) Scoop pesto into bowl and add in grated cheese
5) Cook pasta to al dente and drain
6) Add shrimp to a hot skillet with olive oil. Add salt/pepper to taste and saute until pink and cooked through
7) Add pesto to pasta and mix thoroughly until noodles are coated in the deliciousness. Add shrimp and top with additional grated cheese, if desired.
*The pesto makes about 6 servings

Sunday, March 9, 2014

Quadruple Coconut Oatmeal


I feel like coconut is one of those things that you either love or hate. I personally adore it and always have since I was a kid. I love it in sweet dishes (especially chocolate) and in savory dishes like fish or chicken. I've been reading a bunch of coconut oatmeal recipes and decided it was time I try out a recipe for myself.

I call this quadruple coconut oatmeal because this recipe incorporates shredded coconut, coconut milk, coconut sugar, and coconut oil. I realize that the majority of people don't have coconut sugar in their pantry like I do, so feel free to substitute brown sugar or granulated sugar. Additionally, if you don't have coconut oil you can substitute olive oil when you toast the oats. 


I have shared with you a slow cooker oatmeal recipe before- in fact I believe this was my very first posting! I thought I would show you how easy it is to swap in a few different ingredients to create an entirely different tasting oatmeall. I hope you have fun with this recipe!


My superfood of the week is flax seed. Flax seeds contain omega 3 fatty acids which are said to help lower blood pressure and keep your heart healthy. Additionally, flax seeds contain lignans which have been said to reduce the risk of breast cancer in women and prostate cancer in men. If these benefits aren't enough for you, flax seeds happen to be an excellent source of fiber and protein which will keep you feeling full and satisfied.


Ingredients:
1 tbsp. coconut oil
2 cups steel cut oats
4 cups coconut milk
4 cups water
3 tbsp. coconut sugar
1 tbsp. cinnamon
3 tbsp. flax seeds
3 tbsp. shredded unsweetened coconut
1/2 tsp. sea salt

Directions:
1) Melt coconut oil over medium high heat
2) Add oats and cook for a few minutes or until they smell nutty and fragrant
3) Add oats to crock pot (I lined mine with a non-stick slow cooker bag)
4) Add the rest of the ingredients the slow cooker
5) Cook on low for 4 hours
6) Add additional milk if necessary  
7) Top with bananas, walnuts, or whatever you'd like! 


Sunday, March 2, 2014

Vegetarian Cannellini Bean Soup


It's March 2 and with this bitter cold and snowy weather looming, it does not seem promising that spring is right around the corner. I've been trying to cook more soups and stews to try to keep myself warm in this relentless winter. This particular soup is so easy to make, and it's the perfect portable lunch to take to work. It's super hearty with the cannellini beans but it's light enough that you won't feel weighted down the rest of the day.

You'll see in the recipe that I used gluten free pasta. I personally feel like the gluten free pasta makes me feel less sluggish and provides more nutrients than typical semolina flour pasta. If you're wondering if you can use whole grain or whole wheat instead- you absolutely can but it's going to make the soup a little bit heavier and more starchy. 


Similar to many of my other recipes, this soup is so wonderful because it is extremely versatile. Feel free to add different veggies, use a different kind of bean, or perhaps try experimenting with a different starch like quinoa or rice. 

My superfood of week is the cannelini beans. Cannelini beans provide a ton of fiber and protein and are very low on the glycemic index scale. This means that they metabolize slowly, thus providing steady energy for hours. Additionally, these beans contain the element Molybdenum which is said to have detoxifying effects on the body.


Ingredients:
1 onion diced
2 ribs celery- diced
2 carrots- peeled and diced
1. tbsp Italian seasoning
1 tsp. oregano
1/2 tsp. red pepper flakes
1/2 tsp. salt
1/2 tsp. pepper
1 can rinsed and drained cannellini beans
1 cup frozen corn- thawed
4 cups chicken or vegetable stock (low sodium)
4 cups water
8 oz. pasta (I used gluten free penne)
olive oil
additional salt/pepper- to taste

Directions:
1) Heat olive oil in dutch oven over medium high heat for a 5 minutes
2) Add onion, celery and carrots and saute for 10 minutes or until tender
3) Add cannelini beans, corn, Italian seasoning, oregano, red pepper flakes, salt and pepper, and cook for 2 minutes
4) Add stock and water and bring to a boil
5) Simmer on low for 15 minutes
6) Add pasta and cook 2 minutes shy of al dente (If you are planning on eating the soup in one sitting then cook the pasta all the way to al dente. If you are doing what I do and reheating it all week make sure you cook it a few minutes shy.)
7) Taste and add additional salt/pepper if needed
Enjoy!!!
*This makes about 5 servings 


Saturday, February 22, 2014

Homemade Sunbutter Cups


I have discovered a new guilty pleasure- sunbutter cups. I found them at Wholefoods in the Candy aisle and have been obsessed ever since. The combination of the salty sunbutter with the rich dark chocolate is totally sinful and wonderful. Sunbutter has become the new hot "nut butter" but it's actually made from a seed not a nut! You can find sunbutter at the grocery store in case you don't feel up to making your own, but I'm telling you it's SUPER easy.

I'm really excited that my sunbutter came out so successful, because I want to try making more nut butters at home. I think I am going to try almond butter next, so stay tuned! 


*Note this recipe makes more sunbutter than you will need for the sunbutter cups. You can store the sunbutter in an airtight container at room temperature and use it for whatever you want. Try it on an english muffin with a sliced banana for breakfast or even in a smoothie!


These sunbutter cups have literally 5 ingredients and are SO easy to make. They make for the perfect little treat, and because sunflower seeds have so many health benefits, you don't even need to feel guilty indulging in them!


The sunflower seeds in my sunbutter are a superfood because of their high Vitamin E content. Vitamin E is known to have anti-inflammatory effects reducing symptoms of asthma and arthritis. Sunflower seeds also contain magnesium which can help reduce migraine headaches and lower the risk of heart attack and stroke. Lastly, sunflower seeds have high levels of selenium. Studies have shown an inverse relationship between selenium intake and cancer risk.  


Ingredients
1 cup semi-sweet chocolate chips
2 cups raw unsalted shelled sunflower seeds
1 tbsp. olive oil
3/4 tsp. sea salt
1 tsp. honey

Directions:
1) Roast sunflower seeds in dry skillet over medium heat until golden (Make sure you don't burn them!)
2) Blend sunflower seeds and sea salt in food processor for 6-7 minutes or until paste starts to form
3) When paste-like consistency is reached, slowly drizzle in olive oil and honey. *Note- it is essential not to add the oil until the seeds break down and start to develop into a paste. If you add the olive oil too early you will not be happy with the consistency.*
4) Mix for about another minute
5)Line mini-muffin tray with liners
6) Microwave 1/2 cup chocolate for 30 seconds. Stop and stir, and microwave for an additional 30 seconds.
7) Using a half teaspoon, pour chocolate evenly into liners. (This recipe makes 12 sunbutter cups)
8) Bang muffin tray on the counter to get rid of air bubbles
9) Put the tray in the freezer for 15 minutes
10) When first chocolate layer is hardened, add 1/2 tsp of sunbutter to the top of each cup
11) Put tray in freezer for 15 more minutes
12) Melt the remaining chocolate chips and add to the top of the cups spreading to make a nice even layer.
13) Freeze for a last time for 15 minutes
14) Remove from freezer and sit at room temperature for 5 minutes before enjoying!

*You can store these in the refrigerator for up to a couple of weeks!