Sunday, January 25, 2015

Salmon with Lemon Dill Sauce


I know I've mentioned numerous times how much I LOVE salmon. I especially love cooking salmon because it's so easy to make and always comes out perfectly. One of my goals for 2015 is to start cooking with more herbs. Herbs are so good for you, each with their own unique health benefits. Herbs are also an easy way to add more flavor and depth to healthy dishes. 


My grandmother always used dill in her cooking so I grew up loving this particular herb. When I was shopping at the grocery store the other day, they had a sale on beautiful Atlantic salmon. As soon as I saw the salmon, I envisioned a delicious dill sauce to accompany it, and that's exactly what I made! Dill works really well with all fish, so if salmon isn't your thing, try it on any fish of your choosing. I served the fish with a side of cherry tomatoes and avocado which I think worked perfectly. 


Dill is said to have antibacterial properties which help to regulate levels of bacteria in the body. Dill is also known to be a good source of calcium which can help prevent bone loss, especially in women. Dill's essential oils and flavonoids are said to have calming effects and help with insomnia and restlessness. 

Ingredients:
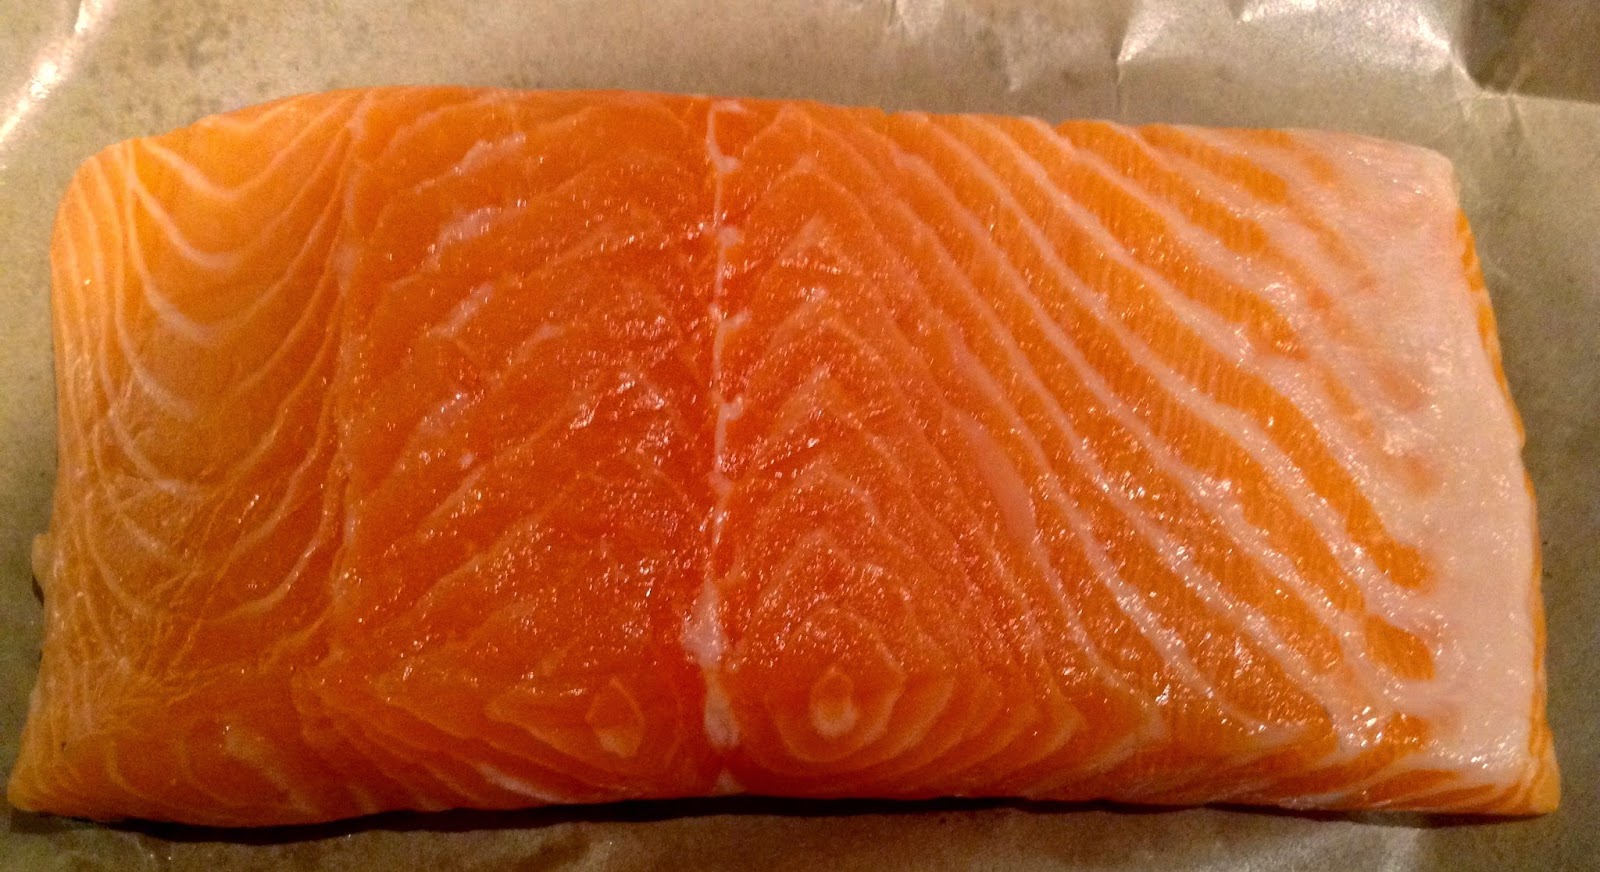
3/4 pound salmon- skin off
1/4 cup olive oil mayo
3 oz. non-fat Greek yogurt
1/2 lemon juiced
1 clove garlic- minced
1/8 cup chopped dill
salt/pepper to taste

Directions:
1) Preheat oven to 400 degrees
2) Line baking sheet with foil and spray with non-stick cooking spray
3) Pat fish dry then season with salt/pepper and place on foil.
4) Make the lemon dill sauce by combining the mayo, Greek yogurt, lemon juice, garlic, dill, and salt/pepper. 
5) Top fish with 3/4 of the yogurt mixture (reserving 1/4 for dipping)
6) Cook salmon for 15 minutes or until cooked through.
7) Serve with extra sauce and enjoy!
*Serves 2-3 people depending on your level of hunger!

Tuesday, January 6, 2015

Avocado Egg Toast


It's January in New England, and you know what that means? Cold and flu season- GROSS. Unfortunately, my husband and I picked up a nasty cold that has been lingering with us for days. Hopefully we'll start to feel better soon, but in the meantime we've been eating lots of superfoods to try to heal us. 

I've been eating fruits and vegetables like it's my job so I can load up on Vitamin C and all of the other necessary nutrients to ward off illness. When determining what to eat for breakfast this morning, I was reminded of a delicious breakfast I had at a cute little breakfast place in my hometown: avocado egg toast. I realized I had all of the ingredients to make this easy and scrumptious breakfast at home, and you know what? It turned out BETTER than the restaurant version. I LOVE when that happens!


I recently started using Ezekiel bread which is a sprouted grain bread. It has far less additives than regular bread, and much less sugar. If you're curious about Ezekiel bread- check out the health benefits here.


Avocados are one of my very favorite superfoods. I've been eating them since I've been sick because I know they're doing great things for my body. Check out one of my other avocado recipes where I discuss some of this fruit's amazing health benefits.


Ingredients:
4 slices whole grain sprouted bread (I used Ezekiel)
1 avocado
4 eggs
1 tbsp. butter
1/2 tsp. salt
1-2 tsp. honey (depending on how sweet you like it) 
1/8-1/4 tsp. red pepper flakes (depending on how spicy you like it)

Directions:
1) Toast bread to your desired darkness
2) Cook eggs to your liking in a non-stick pan with butter. (We cooked ours over easy. The restaurant where I ate this meal cooked theirs sunny side up. Anyway you choose will be delish!)
3) Cut avocado open and scoop out the flesh. Mash in a small bowl with 1/2 tsp. salt.
4) Take the toasted bread and spread 1/4 avocado on each slice. Add one egg to each piece of toast and drizzle each piece with as much honey as you like. Add a sprinkle of red pepper flakes and BAM, you're done. Enjoy!
*This makes 2-4 servings depending on how hungry you are!


Sunday, December 21, 2014

Black Bean "Meat" Ball Burrito Bowls with Avocado Crema


Even though I'm not a vegetarian, I have such a thing for veggie burgers. I love ordering veggie burgers when I go out to a bar or pub for dinner because they never make me overly full. Last summer, my husband and I got addicted to these awesome veggie black bean burgers from Costco. We would grill them, then break them apart and create a burrito bowl with them.

When I looked at the nutrition facts of the Costco burgers I was a bit startled by the sodium levels. I decided I would attempt to recreate them myself and make them much healthier.


The reason I decided to make them into balls instead of patties is because they're so much easier to cook. I just through them in the oven on a sheet pan lined with foil and non-stick spray versus babysitting them on the stove. Also, I figured if I made a black bean burger I'd have to pan fry it in oil, where the "meat" balls I wouldn't have to cook them in any unnecessary fat.


Well, I must say, these "meat" balls turned out incredibly yummy. They're super hearty without being too heavy and they're just bursting with delicious Mexican flavor. We served ours on top of white rice with salsa, shredded cheddar cheese, cilantro, and  homemade avocado crema. YUM! All of the toppings we used are entirely optional so feel free to make the burrito bowls however you please!

Black beans are incredibly nutritious as they are packed with a ton of protein and fiber. Both of these are necessary for maintaining a healthy digestive track and regulating blood sugar. Black beans also contain antioxidants which are said to prevent against many forms of cancer. 


Ingredients:
2 cans black beans- drained and rinsed
1 onion- diced
2 cloves garlic- minced
1 red bell pepper- diced
1/2 cup cilantro-chopped
1 tsp. cumin
1/8 tsp. crushed red pepper flakes
1/2 tsp. sea salt
3/4 cup whole grain/whole wheat bread crumbs
2 eggs- beaten 
optional toppings- rice, extra cilantro, lime wedges, salsa, shredded cheese
Avocado Crema Ingredients:

1 avocado-scooped out
1 clove garlic

1/4 cup cilantro
1/2 tsp. chili powder
1/2 tsp. sea salt
1/4 cup nonfat Greek yogurt
1/2 lime-squeezed

Directions:
1) Preheat oven to 375 degrees and line baking sheet with foil and non-stick cooking spray
2) Heat olive oil in a pan over medium high heat and add onions. Cook for 8-10 minutes or until golden.
3) Add bell pepper and garlic to the onions and cook another 2 minutes.
4) Add cumin, salt, red pepper flakes, and black beans. 
5) Using the back of a wooden spoon- mash half of the black beans.
6) Turn the heat off and pour the mixture into a bowl. Allow to cool for 15 minutes.
7) Add bread crumbs and eggs to the bowl and mix with a spoon.
8) With wet hands take a small portion of the mixture and roll it into a ball and place on lined baking sheet. Repeat this until you have about 24 balls.
9) When the balls are formed place in oven for 30 minutes (flipping half way through)
10) While the balls  are cooking, make the avocado crema by placing all ingredients in a food processor.
11) Blend everything together until creamy. Taste and add more salt if necessary.
12) When the black bean "meat" balls are done, assemble your burrito bowls however you like!


Sunday, December 14, 2014

Crispy Gnocchi with Tomato Basil Sauce


All I have to say is OMG yum. I think this just may be my best recipe yet. (Not to toot my own horn or anything!) This meal was inspired by a dish my husband and I had in Sorrento, Italy called Gnocchi alla Sorrentina. This may have been our favorite meal we had during our whole trip. It was so simple, yet so perfect. The gnocchi was pillowy and the tomato basil sauce was so creamy and decadent. 


Our trip to Italy was 7 months ago, and I don't know what took me so long to try to recreate this dish at home! I bought the gnocchi from the Italian aisle in Whole Foods. It is vacuumed sealed and packaged with all of the other pasta. To be honest with you, I did try to buy fresh gnocchi, (which would be in the refrigerators by the cheese) however my particular Whole Foods was out of it. Boo :( I actually think this may have turned out better by using the dry gnocchi, as I was able to get it really crispy. I think if you use the fresh kind it would be too doughy to get that perfectly crispy outer layer. 


I made my own tomato sauce in this recipe, as I prefer it to the pre-made kind. If you want this to be a quick and easy recipe, you can just purchase a jar of your favorite sauce. Totally up to you!


Basil is the superfood I used in this recipe. Basil is not only delicious, but it is also packed with amazing health benefits. Basil contains magnesium which leads to good cardiovascular health by improving blood flow in the body. Basil also provides Vitamin C which helps protect the immune system and ward off disease. Lastly, basil contains the oil, Eugenol, which helps reduce inflammation in the body.

Ingredients:
1/2 tbsp. butter
1/2 tbsp. olive oil
1 lb. packaged gnocchi
8 oz. buffalo mozzarella- chopped (invest in some good cheese here!)
4-5 cups tomato sauce (homemade or jarred)
2 cups chopped basil
salt/pepper to taste

Ingredients for tomato sauce:
1 tbsp. olive oil
2 carrots-peeled and diced
1 onion- diced
2 ribs celery diced
3 cloves garlic minced
28 oz. can crushed tomatoes
16 oz. can tomato sauce
2 dried bay leaves
1 tsp. italian seasoning
salt/pepper to taste

Directions for sauce:
1) Heat olive oil over medium high heat. Add celery, onions and carrots. Cook until tender. (About 10 minutes)
2) Add garlic and cook for 2 minutes
3) Add tomatoes, tomato sauce, bay leaves, italian seasoning, salt/pepper. Bring to a boil.
4) Cover sauce and simmer on low for 45-60 minutes.

Directions for the gnocchi:
1) Preheat oven to 400 degrees.
2) Cook gnocchi in salted water to package instructions. Drain when finished cooking.
3) Heat olive oil and butter in a medium skillet over high heat.
4) Add cooked gnocchi and cook in oil and butter mixture until golden and crispy stirring constantly. (Will take 8-10 minutes)
5) Add gnocchi to the tomato sauce (If you are not making homemade sauce, heat your jarred sauce in a dutch oven or big pot prior to making the gnocchi)
6) Remove the bay leaves and add 1.5 cups of the chopped basil to the pot. Taste for flavoring and add salt/pepper if necessary.
7) Turn off the heat and add the mozzarella.
8) Put in oven for 2 minutes.
9) Turn the broiler on the oven and cook another 2 minutes or until cheese is bubbly.
10) Serve and enjoy!

Sunday, November 30, 2014

Turkey Waldorf Salad


I hope everyone had a very happy Thanksgiving! This was my first time hosting this year, and I couldn't be more pleased with how the meal turned out! I think hosting Thanksgiving is genius because you are left with SO many delicious leftovers. 

After the third night of hot turkey and gravy, I decided I had enough of it. I still had three entire gallon size zip-lock bags worth of meat though, so I decided to whip up some turkey salad.


This is my grandmother's recipe for Waldorf turkey salad. I typically use chicken in this recipe, but turkey works perfectly as well. The Waldorf salad combines crunchy celery, sweet apples, toasted walnuts and a hint lemon juice to brighten the whole thing up.  Yum!


White meat turkey happens to be a superfood! Turkey contains Vitamin B which is essential for energy production in the body. Regular consumption of turkey can help keep insulin levels steady and reduce bad cholesterol. Turkey also contains the amino acid Tryptophan which produces serotonin. Serotonin is necessary for maintaining a healthy immune system. 


Ingredients:
2 cups shredded turkey breast
3 tbsp. light mayo
3 ribs celery chopped
1 apple diced
1/4 cup chopped walnuts
1/4 tsp. salt
1/8 tsp. black pepper
1/8 tsp. garlic powder
1/8 tsp. onion powder
1/2 lemon- juiced

Directions:
1) Lightly toast walnuts in a skillet over medium heat. Watch carefully as they burn very quickly. They should be toasted within 5 minutes.
2) Combine turkey, celery, apple, and toasted walnuts in a large bowl.
3) Add lemon juice, mayo, salt/pepper, garlic powder and onion powder.
4) Stir everything until well combined.
5) Serve on toast, with crackers, or just by itself!

Saturday, November 22, 2014

Chocolate Coconut Avocado Pudding


OMG..avocados can turn into pudding..Whaaaat? Yes, sir, avocados mixed with coconut milk and all natural cacao powder make the purest, healthiest, most luxurious pudding EVER. Don't believe me? Well try it for yourself and you shall see!

This pudding is not only part of the clean eating diet, it is also completely dairy free and free of refined sugars. The best part about this pudding however, is that nobody will ever be able to tell it's made from avocados unless you want them to!


I was inspired to make avocado pudding after seeing it all over Pinterest. I figured I would try it out for myself and see what all the hype was. To make it my own, I used coconut milk instead of regular milk to make it dairy free and give it a "coconuty" taste. I finished it off with toasted coconut flakes on top which add a nice texture and bite to the pudding.


I think for my next go 'round at avocado pudding, I will try making a peanut butter chocolate version. I will share that with ya'll when it's complete!

Avocados, are of course, the superfood in this pudding. If you want to know the health benefits of this amazing superfood check them out in one of my other avocado recipes here!

Ingredients:
1 avocado- cubed
1/2 cup light coconut milk
1/3 cup raw cacao powder
1/4 cup honey
1/2 tsp. cinnamon
1 tsp. vanilla
4 tbsp shredded coconut (optional)

Directions:
1) To toast coconut for the topping- Add coconut to a pan over medium heat. Cook for just a couple of minutes until toasted. *Note- it is VERY easy to burn coconut so make sure you watch it, as it really only takes a few minutes.
2) Add avocado, coconut milk, cacao powder, honey, cinnamon, and vanilla to food processor. Blend for 1-2 minutes until desired consistency is reached.
3) Taste for sweetness. I don't like things overly sweet so you might want to add more honey to your pudding if you like things sweeter.
4) Place pudding in the fridge to cool for 30 minutes.
5) To serve, put pudding in bowls and top with shredded coconut.
6) Enjoy this guilt-free delish dessert! You can thank me later. :)


Sunday, November 9, 2014

Asian Salad with Sriracha Glazed Salmon


I'm always looking for ways to make salad more exciting. I like using lots of different vegetables, adding herbs, switching up the proteins, and adding something crunchy on top like nuts or seeds.

In the last year, I've been trying to stick to a clean-eating diet. That means reducing the preservatives and additives in the food that I eat. This also means not using bottled salad dressing, like I've always done in the past.

Believe it or not, salad dressing is SUPER easy to make yourself. I also find that most of the time I have 90% of the ingredients in my house already, so I wind up saving money!

I cannot take credit for this particular salad dressing, as it is my mom's recipe. Whenever I taste this dressing, I always think of her and her delicious meals.


As like most of my other recipes, this salad is extremely versatile. You can pretty much switch up everything in it to suit it to your particular taste buds. For the lettuce, I used a combination of baby spinach and Napa Cabbage. You could switch this up and use romaine, arugula, or spring mix. I used cilantro as my herb in this salad, but if you don't like cilantro you could add parsley, or even fresh basil.

Lastly, you'll notice these delicious looking cashews on top of this salad. These are homemade sriracha cashews that I experimented making. Here is the recipe in case you're interested!

My superfood is the Napa cabbage. Napa cabbage contains antioxidants which help protect the body against harmful free radicals. This in turn, can help prevent many cancers as well as heart disease. Napa cabbage also contains Vitamin C which helps the body fight infection and stay healthy. Napa cabbage is also packed with fiber which is excellent for digestion and weight loss. 


Ingredients:
1 small head of Napa Cabbage- chopped
3 cups baby spinach
1 red bell pepper- sliced
1/2 English cucumber- sliced
1/2 cup water chestnuts- sliced
1/2 cup shredded baby carrots
1/4 cup chopped cilantro
1/4 cup cashews (optional)

Ingredients for Salmon:
3/4 lb. salmon filet 
1 tbsp. sriracha 
1 tbsp. soy sauce
1 tbsp. oyster sauce
1 tsp. brown sugar

Ingredients for Salad Dressing:
2 tbsp. light mayo
1 tbsp. sesame oil
1 tbsp. soy sauce
1 tbsp. grated ginger
1 tbsp. rice wine vinegar

Directions:
1) Preheat oven to 400 degrees. 
2) Combine all salad ingredients (minus cashews) in a big bowl.
3) Prepare the dressing by whisking all ingredients together. 
4) Place salmon on a baking sheet lined with foil.
5) Combine the salmon ingredients- sriracha, soy sauce, oyster sauce, and brown sugar in a small bowl. Using a pastry brush, glaze the top and sides of salmon with the mixture.
6) Bake salmon for 15-20 minutes or until cooked through.
7) Pour dressing over salad and stir to combine. (We didn't use all of the dressing on ours)
8) Add cooked salmon on top of each plate and top with cashews.
9) Eat up and enjoy this healthy meal!