Pages

Thursday, July 14, 2016

Oven Sweet Potato Fries with Spicy Ketchup


Sweet potato fries are one of my most favorite indulgences. There's something about that salty/sweet thing that is just irresistible. 


I discovered an amazing sweet potato fry recipe a year or so ago that I have just now decided to recreate and make my own. The secret to this recipe is the coconut flour. It makes the fries get crispy on the outside and super soft and chewy on the inside. They're utterly perfect.


I served mine with a homemade spicy ketchup that takes legit- 1 minute to make. It's a simple combination of store-bought ketchup and Indian spices. 


If you want to know all of the amazing health benefits of sweet potatoes check out one of my other recipes here.

Ingredients:
1 large sweet potato- peeled
1 tbsp. olive oil
1.5 tbsp. coconut flour
1/2 tsp. garlic powder
1/4 tsp. sea salt
1/4 tsp. black pepper

Ingredients for ketchup:
1/4 cup organic ketchup
1/4 tsp. garlic powder
1/2 tsp. cumin
1/4 tsp. smoked paprika
1/8 tsp. cayenne pepper

Directions:
1) Preheat oven to 425 degrees.
2) Slice sweet potato into small planks. Add planks to a large bowl.
3) Mix coconut flour, garlic powder, sea salt and black pepper in a small bowl.
4) Add olive oil to the sweet potato and top with spice mix. Stir with your hands to combine.
5) Line a baking sheet with foil and spray with non-stick cooking spray. Add sweet potato fries and spread evenly so no potatoes overlap.
6) Bake for 30 minutes string halfway through.
&) Make ketchup by combing all of ketchup ingredients together.
*Recipe makes 2 servings 

Thursday, June 23, 2016

Power Quinoa Breakfast Bowls


Breakfast- the most important meal of the day.It also happens to be my favorite meal of the day, but I must say planning what I'm going to each each morning gets exhausting. From a nutritional point of view, breakfast is supposed to contain protein and fiber to keep you full and satiated and ready to take on the day. I try to make myself a well balanced each morning- but I get sick of things quickly, so I'm always trying to switch it up,


My husband and I have been on a bit of a hard-boiled egg kick lately. We boil a dozen for the week and throw them in salads and eat them for snacks. They're great to eat for breakfast as well- and it's so convenient when you already have some in the fridge!


I came across a similar recipe to this one on pinterest and decided I needed to recreate my own version. I used quinoa as the base- but you could use whatever grain you like. I topped the bowls with the eggs, a spoonful of pesto, a few pieces of avocado and some cherry tomatoes for some color.

I've been buying my pesto at the whole foods salad bar lately- cheating I know! I checked out the ingredient list, however, and it's completely clean so I feel no guilt. If you want to make homemade pesto and are looking for as good recipe- check out my avocado pesto recipe here.


Quinoa is an amazing superfood. Click here to find out about its wonderful health properties.


Ingredients:
4 hard boiled eggs (directions on the perfect hard boiled egg below)- sliced
1 cup cooked quinoa
6 cherry tomatoes- sliced
2 tbsp. pesto
1/2 avocado- sliced

Directions:
1) Split cooked quinoa among 2 bowls
2) Top each bowl with sliced eggs, avocado, tomatoes and a tbsp. of pesto
Enjoy!
*Recipe makes 2 servings 

Hard boiled egg instructions:
1) Place eggs in pot. Add enough water to cover the eggs and add a sprinkle of sea salt. 
2) Bring pot and eggs to a boil.
3) Once boiling, remove from heat and sit for 8-9 minutes with lid on.
4) Remove eggs and place in an ice bath to stop the cooking
5) Peel and enjoy!
*Eggs will keep for about 5 days in the refrigerator 

Sunday, June 5, 2016

Grain-Free Pancakes with Peanut Butter Drizzle and Berries


Pancakes are my most favorite breakfast on the weekends. I've been trying to limit my carbs lately, however (for bathing suit season), so I haven't been indulging in them. I had read about paleo pancakes before just using a banana and 2 eggs and I must say I was a little bit skeptical. I mean how can you make a pancake with no grains whatsoever, right?!


My husband was traveling the other week, so I decided to experiment with these paleo pancakes, as I didn't think he'd enjoy them. I tweaked them a little bit by adding some baking soda to make them fluffy and a few extra ingredients to give them a little pizzazz. 


I was shocked, as these really turned out to be quite delicious! They obviously don't take like a regular pancake, but they are equally as good! They're more of a crepe consistency, but they actually taste decadent. I made them again yesterday for my husband and he really enjoyed them!


What I love the most was that they were super easy to flip and really didn't break apart in the pan like a traditional pancake. This also made the clean-up super simple.


To make them even more delicious I decided to make a peanut butter drizzle by combing peanut butter and coconut oil and heating it in the microwave to make a creamy sauce. I poured it on top of the pancakes and topped with blueberries and raspberries. Oh my goodness- so yummy.


Bananas and eggs are both superfoods. To find the nutritional benefits of each click here or here at some of my other recipes.

Ingredients:
2 ripe bananas
4 eggs
1/2 tsp. baking soda
1/4 tsp. sea salt
1/2 tsp. cinnamon
1/2 tsp. vanilla


Ingredients for drizzle:
2 tbsp. natural peanut butter

1/2 tbsp. coconut oil

Optional toppings:
Strawberries
Raspberries
Blueberries
Slivered Almonds 
Peanuts
Chocolate Chips 

Directions:
1) Combine first 6 ingredients in a blender until smooth.
2) Heat a pan over medium high heat.
3) Pour mixture into pancake forms and cook about 2 minutes before flipping.
4) Cook another minute on the other side
5) Repeat until all of the batter is used
6) To make topping- combine peanut butter and coconut oil in a microwavable safe bowl.
7) Microwave for 30 seconds and stir until silky and smooth.
8) Pour over pancakes and top with berries
*Recipe makes 2 servings

Thursday, May 19, 2016

Vegan Tempeh Veggie Bowls


Oh my goodness do I love these bowls! They're beautifully colorful, light, yet hearty and oh so delicious. 

My husband travels a lot for work and when he's gone I pretty much eat vegetarian. He's not opposed to veggie meals, but he definitely appreciates his animal protein. When he's away I really like to get creative and make myself delicious new vegetarian or vegan recipes. 


Similar to most of my other recipes, this one is very versatile. Feel free to get creative with this bowl and sub out veggies for ones you like better or maybe play around with the sauce. I must say, however the sauce is perfection. It's salty and sweet at the same time with just a little kick. YUM.


This bowl is PACKED with superfoods- it was difficult for me to pick one to talk about! I decided to discuss the benefits of tempeh, as I've never featured it before. Tempeh is fermented soybeans and fermented foods are loaded with health benefits. Tempeh helps aid in digestion by breaking down harmful bacteria and regulating the appetite. It also helps protect the immune system and ward of disease. Tempeh also contains Vitamin B3 which is known to lower cholesterol and help strengthen the cardiovascular system. 


Bowl Ingredients:
8 oz. package of tempeh
1/2 tbsp. soy sauce
4 cups of mixed dark greens (I used Trader Joe's Cruciferous Crunch)
2 cups arugla 
1 red bell pepper- diced
2 cups butternut squash- diced
1 avocado- diced
2 tbsp. sunflower seeds
1/2 tbsp. coconut oil
1/2 tbsp olive oil


Dressing Ingredients:
1/2 tbsp. soy sauce
1 tbsp. all natural peanut butter
1 tsp. rice wine vinegar
1 tbsp. almond milk (unsweetened)
1 tsp. red curry paste

Directions:
1) Preheat oven to 400 degrees. 
2) Place diced squash on a baking sheet and toss with olive oil. Roast for 25 minutes (stir halfway)
3) Heat a pan over medium high heat. Add coconut oil until melted. Crumble tempeh with your hands and add to the pan. Use a wooden spoon to break tempeh into smaller pieces. Add 1/2 tbsp soy sauce and cook for about 3-4 minutes stirring constantly until tempeh is golden.
4) Remove tempeh and add diced bell pepper. Cook for about 2 minutes or until just barely tender.
5) Combine dressing ingredients together in a bowl and whisk until thoroughly combined. 
6) Build your bowl! Start with the kale mix then add arugula, tempeh, squash, bell pepper, avocado and sunflower seeds. Drizzle dressing on top and enjoy!
*Recipe makes 2 bowls however there should be extra sauce!

Friday, May 6, 2016

Zoodles with Avocado Pesto and Spicy Shrimp


It's almost bathing suit time, guys. What that means for me is that I need to start cutting back on carbs! I discovered zoodles last summer and have been completely obsessed with them ever since. They really take on the flavor of whatever you add to them, and you really do not miss the pasta at all! 


I've been making my own avocado pesto for a little while now and it's SO SO good. Here is the recipe. You don't need any oil because of all of the delicious healthy fats in the avocado. 


To see the health benefits of zucchini check out one of my other recipes here.


Ingredients:
1/2 avocado pesto recipe
1 tbsp. olive oil
1/2-3/4 pound shrimp- peeled & deveined
1/4 tsp. Cajun seasoning
2 zucchinis- spiralized
10 oz. cherry tomatoes- sliced
1/4 cup grated Parmesan
salt/pepper to taste

Directions:
1) Make avocado pesto. Freeze half and reserve the other half for this recipe. Set aside.
2) Cook shrimp in 1 tbsp. olive oil over medium high heat. Add Cajun seasoning and cook until pink and completely cooked through- 3-5 minutes.
3) While shrimp cooks- spiralize your zucchini and set aside.
4) Remove shrimp from pan and add cherry tomatoes. Cover and cook for about 5 minutes.
5) Remove lid and add spiralized zucchini and cook for about 2 minutes. Add shrimp back in and the pesto. Stir pesto around until everything is coated and hot- about 2 more minutes.
6) Taste and add salt & pepper if desired.
7) Serve in bowls with grated Parmesan on top. Enjoy!

Wednesday, April 13, 2016

Spicy Roasted Chickpeas


I am always looking for new healthy snacks to bring to work. I recently discovered roasted chickpeas and instantly fell in love. They are crispy, and crunchy and incredibly good for you.


This is the first time I have ever made them at home, and let me tell you- they are SO easy to make. I made a spicy, savory version, but I think next time I will try a cinnamon sugar variation.  Feel free to customize this recipe and make it your own!


Chickpeas are packed with nutrients. To read about the health benefits click on one of my other recipes here.

Ingredients:
2 cans chick peas- rinsed and drained
2 tsp. smoked paprika
2 tsp. garlic powder
1 tsp. sweet paprika
1 tsp. cayenne pepper
1 tsp. sea salt
1/2 tbsp. olive oil

Directions:
1. Pour drained chick peas into a bowl lined with paper towels. Lie more paper towels on top and sit at room temperature for 30 minutes. 
2. While the chickpeas drain, preheat oven to 400 degrees.
3. Prepare spice mix by mixing paprika, garlic powder, cayenne, and sea salt into a small bowl.
4. Add chick peas onto a large baking sheet and bake for 30 minutes- stirring halfway through.
5. Add chickpeas to the same bowl you used earlier and coat with olive oil. Add spice mix and stir to combine.
6. Place back on baking sheet and bake for another 20-25 minutes or until crispy, stirring halfway through again.
7. Allow to sit at room temperature for 10 minutes before eating.
*Note- I wound up re-crisping mine the next day as I did not let them cook enough the first time. Make sure when you take them out of the oven that they are very crunchy!

Sunday, March 27, 2016

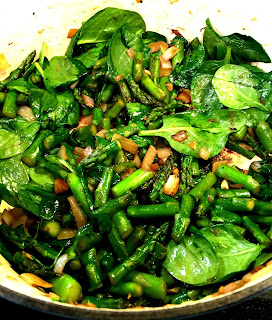
Spring Asparagus Soup


I don't know about you, but I am SO ready for spring weather! I guess it's fair to say we New Englanders had a pretty easy winter, but I just am ready for it to be over! I'm ready for flowers to bloom, for the sun to be out, and to not have to wear my wool coat every day. I think my mindset with cooking has completely shifted to spring as well.


When I think of the "springiest" vegetable, asparagus comes to mind. Prior to this recipe I had never made asparagus soup, but I had been wanting to for a while. When I browsed some recipe ideas many of them called for milk or sour cream, but I opted to keep mine low-cal and dairy free and it still came out super creamy and delicious.

Funny enough, I was watching Food Network this morning and Trisha Yearwood was making asparagus soup. She suggested adding spinach to the asparagus to ensure the soup has a bright green color at the end. She said without it it'd be a very muted, non-appetizing green. Well, I followed her directions and the color came out gorgeous!


This is a SUPER easy recipe so feel free to get creative with the toppings. I served mine with some lemon zest and truffle oil, but you could add herbs, Parmesan or whatever you'd like.

Asparagus is such a healthy vegetable. It is known to prevent against certain types of cancer because it contains the detoxifying compound, glutathione which breaks down harmful free radicals. Asparagus is also a great source of Vitamin C which can ward off illness and Vitamin B which can promote brain health. Lastly, asparagus is a natural diuretic as it contains asparagine which is an amino acid that helps cleanse the body of excess salt.


Ingredients:
2 bunches of asparagus- chopped into 1 inch pieces
1 small yellow onion- diced
2 gloves garlic- minced
2.5 cups low sodium chicken or veggie stock
2 cups spinach
1 tbsp. olive oil
1/2 tsp. sea salt
1/4 tsp. black pepper
1 tbsp lemon zest for topping (optional)
1 tbsp truffle oil for topping (optional)

Directions:
1) Heat olive oil in a dutch oven over medium high heat.
2) Add asparagus pieces and onion and saute for 4-5 minutes.
3) Add garlic and cook for another minute or two until all vegetables are tender. Season with salt and pepper to taste.
4) Turn off the heat and add the spinach. Stir until spinach is slightly wilted- about 1 minute.
5) Add mixture and 2 cups of chicken stock to a blender. Blend on high until smooth. (You can also use an immersion blender as well- I unfortunately don't have one yet!)
6) Pour back into dutch oven with remaining 1/2 cup of chicken stock. Bring to a slight boil, then turn heat to low and simmer for 10 minutes.
7) Serve in bowls with desired toppings.
*Recipe makes roughly 4-5 servings

Sunday, March 6, 2016

Guest Blogger- Homemade Sauerkraut


Hi! My name is Mark and I am happy to be guest blogging this week on TheSuperFoodsGirl blog! I have always enjoyed cooking and trying new foods. I also enjoy gardening and have been growing foods organically for close to 30 years. 


I have been making my own sauerkraut for quite some time now, not only because I like it but also because it's such a healthy food- a real superfood! 


Because sauerkraut is a fermented food it has quite a few health benefits. First it is a great source of probiotics which can aid in rebuilding and maintaining healthy gut bacteria levels. It is also a great source of Vitamin C and is thought to have cancer fighting properties. 


Ingredients:
1 3 lb. head of cabbage
1.5 tbsp. kosher salt (add 1/2 tbsp per pound of cabbage.)


Directions.
1) Wash the cabbage.
2) Remove and reserve outer leaves. 
3) Slice into 8 wedges and remove the core. Slice across each wedge to form thin ribbons of cabbage.
4) Place into a mixing bowl and add kosher salt.
5) Mix the salt and cabbage by squeezing and massaging it for 5-10 minutes. This will begin to release liquid from the cabbage and create a brine.
6) Place the cabbage and brine in a large glass bowl or container pressing as you go to compact the mixture.
7) Place reserved outer leaves on top of the sliced cabbage. Fill a small mason jar with water and secure with a lid. Place the jar on top of the cabbage mixture to act as a weight to compact the cabbage. This is done to ensure the cabbage is submerged in the brine. 
8) Place a towel over the large bowl/container and fasten with a rubber band. This covers it but still allows the air to circulate. Place in a cool dark spot. (If after 24 hours there is not enough liquid to cover the cabbage, add more brine by combining 1 tsp kosher salt into 1 cup of water and adding it to the mixture. 
9) Let the mixture stand covered for 3-10 days. You can taste it to see how long you want it to ferment. I like it after about a week.
10) Store in the fridge and enjoy!

Monday, February 22, 2016

Superfood Miso Soup


I love making soup in the winter. I've recently discovered how easy it is to make a big bowl of soup on a Sunday afternoon and eat it all week long for lunch at work. This particular recipe is my take on miso soup and it couldn't be any easier or any more delicious. I load it with tofu, shitake mushrooms, carrots, seaweed and soba noodles for a healthy and hearty meal.


My secret ingredient is Trader Joe's Miso ginger broth which I recently discovered. It's so flavorful and very low in calories. It makes the perfect base for this soup, and I highly recommend it. If you for some reason do not live near a Trader Joe's, you can use vegetarian broth with a tablespoon or two of miso paste.


For veggies in this soup I used carrots and shitake mushrooms, but you could really use anything you like. For the tofu I would recommend using extra firm so it doesn't crumble in your soup.

Miso is an incredible superfood. To check out its health benefits click here.


Ingredients:
1 package of extra firm tofu
16 oz. shitake mushrooms- sliced
1 cup chopped carrots
2 cartons of ginger miso broth
8 oz. soba noodles- cooked to package instructions and set aside
1 tbsp. liquid aminos or soy sauce
4 sheets of nori seaweed- torn (I like the Emerald Cove brand from Whole Foods)
1 tbsp. olive oil

Directions:
1) Wrap tofu in several paper towels to drain excess water. Let sit in paper towels for about 10 minutes. 
2) Add 1/2 tbsp. olive oil to a dutch oven over medium high heat.
3) Unwrap tofu and cut lengthwise into planks and then again in half. (Should get 8 pieces)
4) Add to dutch oven and cook about 3 minutes one each side or until golden brown. Remove from dutch oven and set aside.
5) Add remaining olive oil to dutch oven and add carrots and mushrooms. Cook for about 5-8 minutes or until tender. Add liquid aminos and cook another minute. 
6) Add broth to dutch oven along with tofu and seaweed. Bring to a boil and then return heat to medium and simmer for 15 minutes.
7) To serve place a handful of noodles in a bowl and add soup. Enjoy!

Friday, February 5, 2016

Easy Crispy Lemon Cod


I don't know about you,  but I find it challenging to cook anything elaborate during the week. I've discovered what works best for me are easy 30 minutes (or less) meals and then having enough for leftovers for the next day.

This fish recipe takes no more than 15 minutes to prepare and cook, and it tastes absolutely delicious. You can use whatever white fish you happen to have on hand. I used cod, but haddock, striped bass, sole or tilapia would all work fine as well. 


Fish freezes really well too. My advice to you is to buy a few pounds of it when it's on sale (always opt for wild caught fish) and package it into portions. You can then freeze the individual portions and use them whenever you need an easy weeknight meal. 

I served this with roasted cauliflower and butternut squash, but it truly goes well with anything.

Cold water fish (cod in particular) is said to reduce the risk of heart disease and heart attack due to its omega 3 acids. Cod also provides a good amount of Vitamin B12 and Selenium which are known to reduce the risk of developing certain cancers. Lastly, cod is a great source of lean protein which can aid in weight loss.

Ingredients:
1 pound white flaky fish- such as cod
1/2 cup whole wheat panko bread crumbs
zest from 1 lemon
1/8 cup grated parmesan
1 egg- beaten
salt/pepper to taste
parsley- chopped (optional)
lemon slices (optional)

Directions:
1) Pat fish dry with paper towels. Sprinkle each side with salt and pepper.
2) Combine bread crumbs, lemon zest, Parmesan, and salt/pepper in one bowl.
3) Dredge fish in beaten egg then in bread crumb mixture. 
4) Heat a pan over medium high heat. 
5) Cook fish on each side for 3-4 minutes or until cooked through.
6) To serve top with lemon slices and parsley.

Saturday, January 16, 2016

Clean Eating Cashew Butter Fudge Cups


I mentioned in my last post that I am currently partaking in a clean eating challenge through the end of this month. I find this challenge to be pretty easy except for the fact that I miss chocolate so much. I am a definite chocoholic and crave at least a small piece of dark chocolate on a daily basis. Because this challenge refrains from eating processed sugar, it's been hard to find my fix.

I saw a recipe for clean eating almond butter cups that I decided to recreate using cashew butter because it's what I had in my house. The result is AMAZING. These cashew cups are creamy and decadent and best of all clean and free of anything processed. They are also vegan, paleo and gluten free so they can be enjoyed by almost anyone.


I'm pretty sure they would be delicious with any kind of nut butter so play around and use whatever you have on hand. I would however, recommend the salted variety as it creates that delicious salty/sweet thing that we all love. I hope you enjoy these as much as I did!

Coconut oil is my superfood of the week. To find out about its health benefits click here!


Ingredients: 
2/3 cup coconut oil- melted
2/3 cup cocoa powder
1 cup cashew butter (or whatever nut butter you want)
1/3 cup maple syrup
3/4 tsp. vanilla

Directions:
1) Combine all of the above ingredients in a food processor.
2) Line a mini muffin tin with 12 liners.
3) Pour "batter" into the liners and place tray in freezer for an hour.
4) Store in the refrigerator for up to a month!

Wednesday, January 6, 2016

Balsamic Chicken Caprese Salad


Happy New Year everyone! It is hard to believe it's January already! For the start of the new year I decided to challenge myself to do a 4 week clean eating cleanse. I definitely overindulged this holiday season, and I needed a push to get back on the healthy eating wagon. 

This "cleanse" is really safe, healthy, and actually pretty easy. The main rules are to avoid processed food, white sugars and white flours. Other than that you can pretty much eat whatever wholesome foods you want. 


My husband agreed to do this challenge with me. That being said I knew I needed to come up with something delicious for him to take to work this week. His typical lunch consists of a turkey and cheese sandwich which does not fit into this clean eating challenge. I came up with this salad because it's light and flavorful but also extremely hearty, so I knew it would satisfy him.


My favorite part about this meal is the dressing- it's a creamy balsamic vinaigrette made with Greek Yogurt. Not only is it delicious, but it also provides an extra dose of protein!

My superfood of the week is tomatoes. Check out the health benefits here.


Ingredients for Chicken:
1 lb. chicken breasts
1 tbsp. olive oil
1 tbsp. balsamic vinegar

Ingredients for Salad:
Cooked balsamic chicken (above)- sliced
4 cups arugula
2 cups spring mix
1 pint cherry tomatoes- sliced
8 oz. fresh mozzarella- cubed
1 avocado- sliced

Ingredients for Dressing:
1/4 cup Greek Yogurt
1/4 cup Balsamic Vinegar
1/8 cup olive oil
salt/pepper to taste

Directions:
1) Place chicken breasts in a zip-top bag and add olive oil and balsamic vinegar. Marinate overnight.
2) Preheat oven to 350 degrees. Place a piece of foil sprayed with non-stick cooking spray in a 9x13 pan. Place chicken on the pan and bake for 25-35 minutes or until cooked through.
3) When chicken is finished cooking let it cool for 10 minutes. Then place on cutting board and slice into thin pieces.
4) While chicken is cooling, add dressing ingredients to a mason jar and shake vigorously until well blended.
5) Assemble salad by combining all of the salad ingredients together along with the chicken slices. Add into individual bowls and top with dressing.
*This recipe makes about 4 salads